
Wrangling DNS on Your Network, Part 3: pfBlockerNG
This is part of a multi-part series on DNS. Part 4 will be coming soon!
Everyone loves adblock, myself included, so of course I set up a Pi-hole a while ago. It does so much more than just regular old browser-based adblock does, because there’s no option to block ads with a browser extension in things like Android apps.
But now that we have this set up, you might be wondering if there’s another way. After all, in a homelab environment, of course everyone always wants to screw with things. Well, you’d be right. Conveniently, pfSense has a package called pfBlockerNG, that aims to basically do something like Pi-hole. It’s not strictly for ad-blocking, but rather for general purpose DNS filtering.
As you can imagine, this makes it a lot more powerful than Pi-hole, but it also means there’s a lot more of a learning curve.
We’ve already set up Pi-hole, so if all you’re looking for is DNS adblock, and the pfSense DNS for local hostnames, you’re all set, and it’s a perfect spot for you to stop. If, however, you want a more powerful tool than Pi-hole, this part in the series tackles that.
So, will you take the red pill, and dive into the rabbit hole, or will you take the blue pill and remain in blissful ignorance?
Installing pfBlockerNG
pfBlockerNG is a package for pfSense, so naturally, it’s under System > Package Manager. When you search for it, you’ll see something like this:
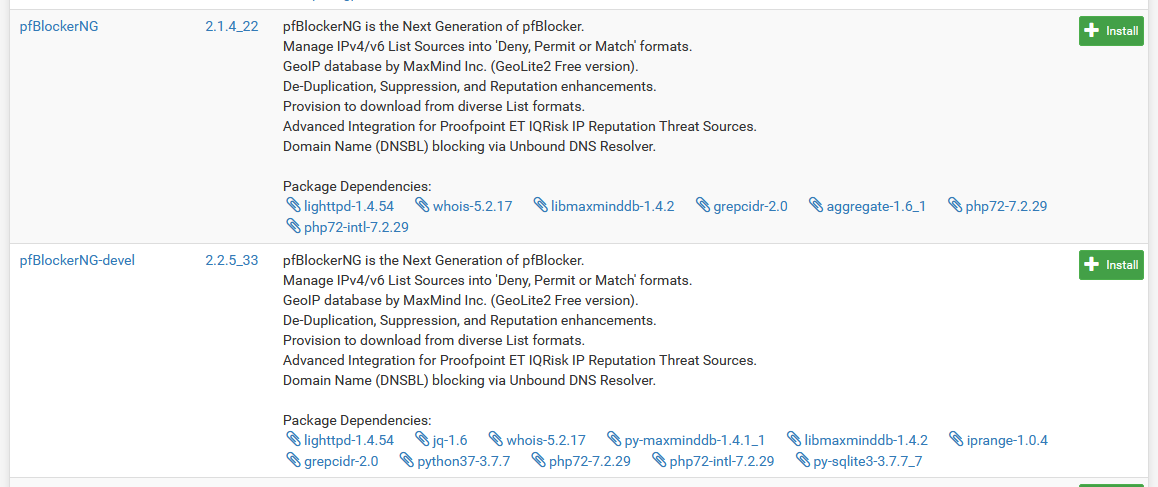 There's two separate versions here
Your two choices for installing are what looks like a normal version, and a development version. Here’s the thing: that’s not quite right. The devel version is very much stable, and is basically a rewrite of the UI that makes everything easier to work with. Because of this, we’re going to be installing the devel version, which I’d recommend you also do. If, however, you’re a masochist, the layout will be a bit different for you, and it may be harder to follow along here.In any case, click install, wait for it to do its thing, and it’ll set everything up.
It should be noted that at the time of writing, the main package is v2.1.4_22, and the devel package is v2.2.5_33.
BBCan177 has told me that the plan is for devel to become the main version sometime hopefully soon, so if you’re reading this in the future, the main package might not be as masochistic.
Now, I know what you’re thinking:
I know how this goes! We did this with Pi-hole. Now that we installed everything, we're done!
Well, not exactly. pfBlockerNG isn’t an out of the box ad-block tool. It’s a filtering tool that leverages the pfSense firewall, so out of the box, we get nothing. We still have quite a bit of setup to do before we’re done.
Navigate your way to Firewall > pfBlockerNG and it’ll present you with a fancy-looking wizard to help get started.
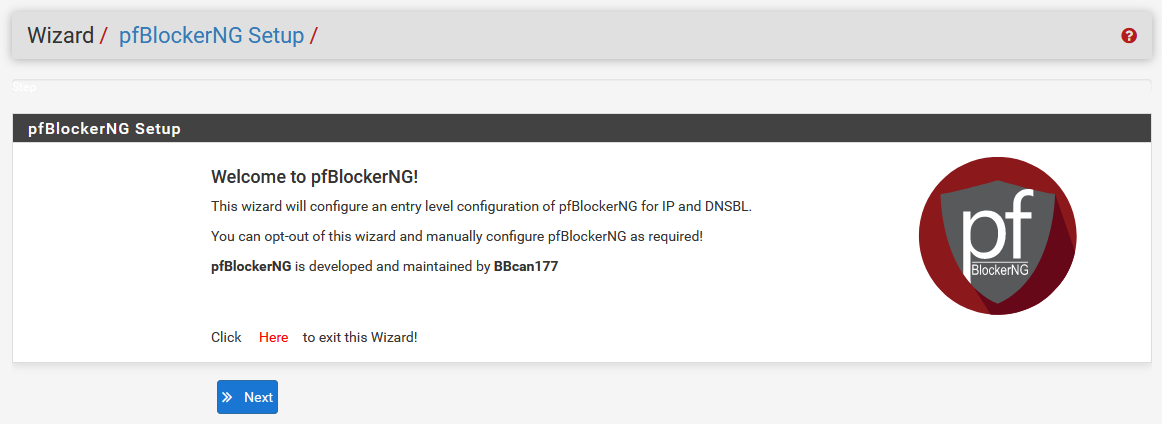
There’s nothing to do here, so click Next.
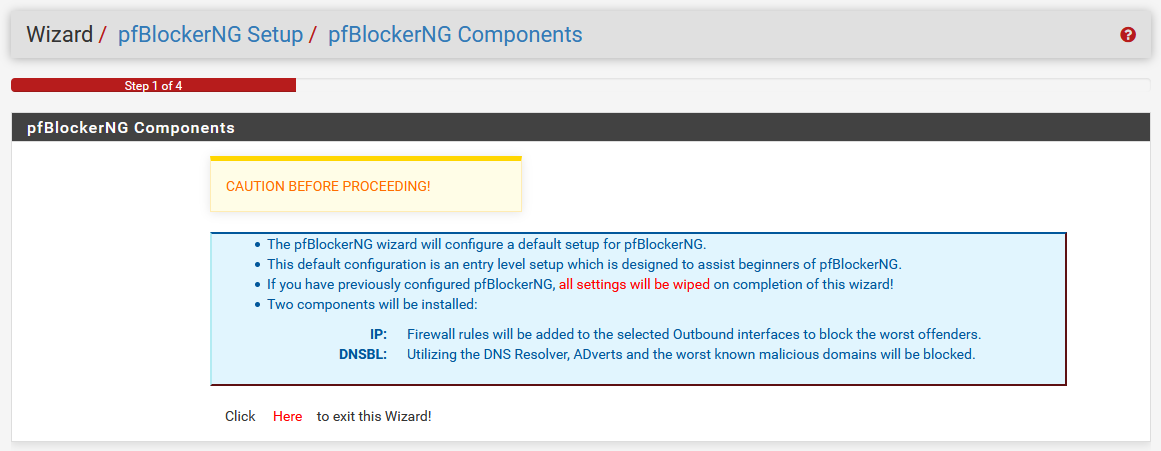
It’ll warn you about some stuff with a pretty serious looking disclaimer. If you’ve installed pfBlockerNG previously, this wizard is gonna blow out those settings.
pfBlockerNG works in two parts. There’s a DNS block list, referred to as DNSBL, which is going to be used like we did with the Pi-hole. This leverages the existing DNS Resolver that we’re already using to handle this blocking of things!
Anyway, there’s again, nothing to change just yet, so hit Next again.
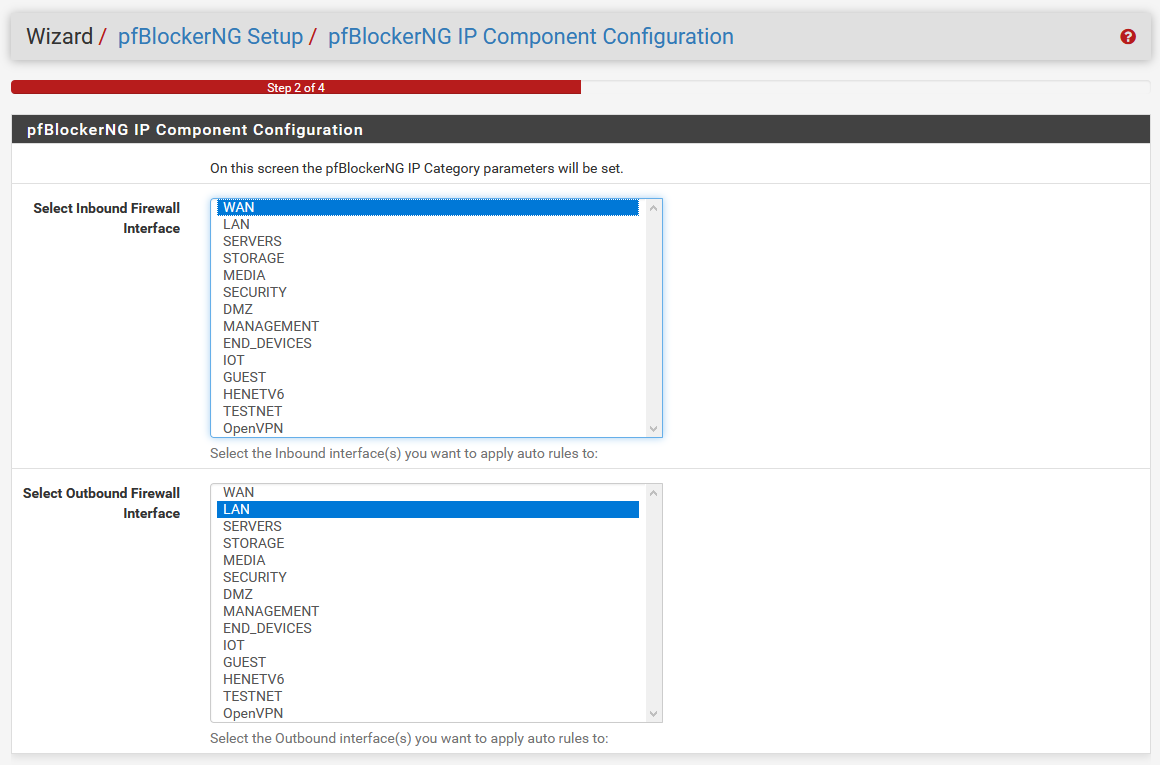
Whoa, whoa, whoa! Pi-hole was way easier to set up than this! What the heck is this big scary thing‽
Depending on your VLAN setup, this list can look a little scary, and this window seems kind of intimidating anyway. For a basic setup, the default options for WAN for inbound, and LAN for outbound, are okay. If, however, you have a VLAN setup, or have other interfaces you want to work with, you’ll want to change them accordingly. Since I’m running with VLANs, I chose my End Devices and IoT VLAN interfaces in place of LAN for the outbound.
Unless you have a weird dual-WAN setup, or some other edge case, you can leave inbound alone. Click Next to keep on going.
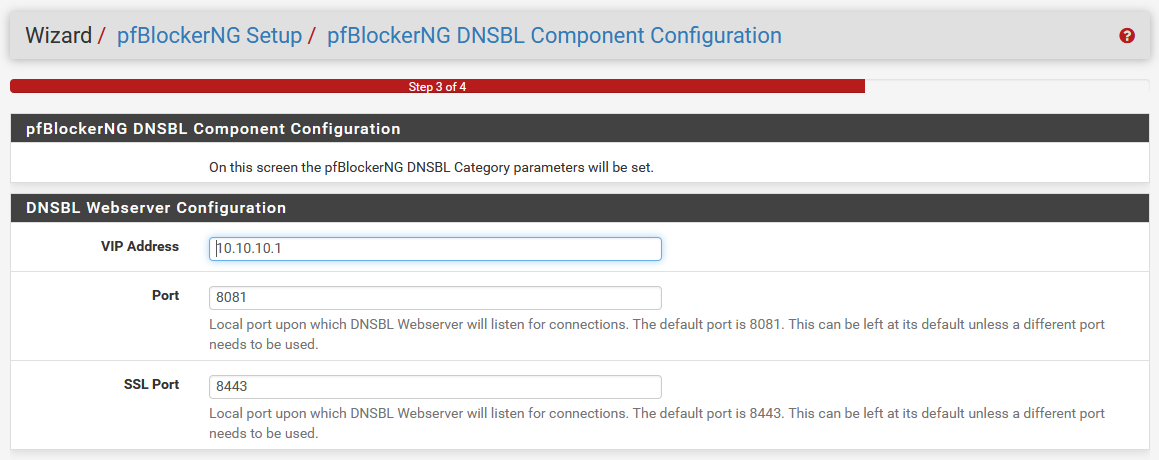
Next, it’s gonna ask for a few more things. To handle the listening of the DNSBL connections, it needs to set up its own web server. This is not a thing we ran into with Pi-hole, because I believe it just redirects to 0.0.0.0.
In the case of pfBlockerNG, it’s going to prompt us for this, and dedicate a proper blackhole address. Make this VIP address something you’re not using on your network, because if this address is used elsewhere, you’re gonna have some problems.
Unless you’re using the default ports of 8081 and 8443 for something else there, leave those as default. Click Next to move to the last step.
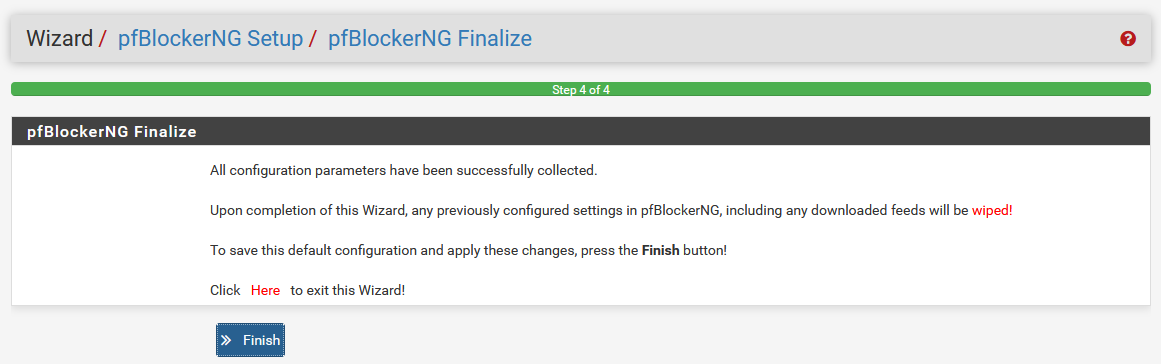
Okay, I lied. It’s not really a step. More disclaimers about what’s gonna happen, because you’re gonna click things, and get a big scary window, and if you don’t know what it is, it might freak you out a bit. There’s a Finish button, and I think you guys know the drill by now.
Anyway, when you’re done, you’re gonna see this big scary thing, and it’s got a lot of stuff on it, and it’s probably freaking you out a bit.
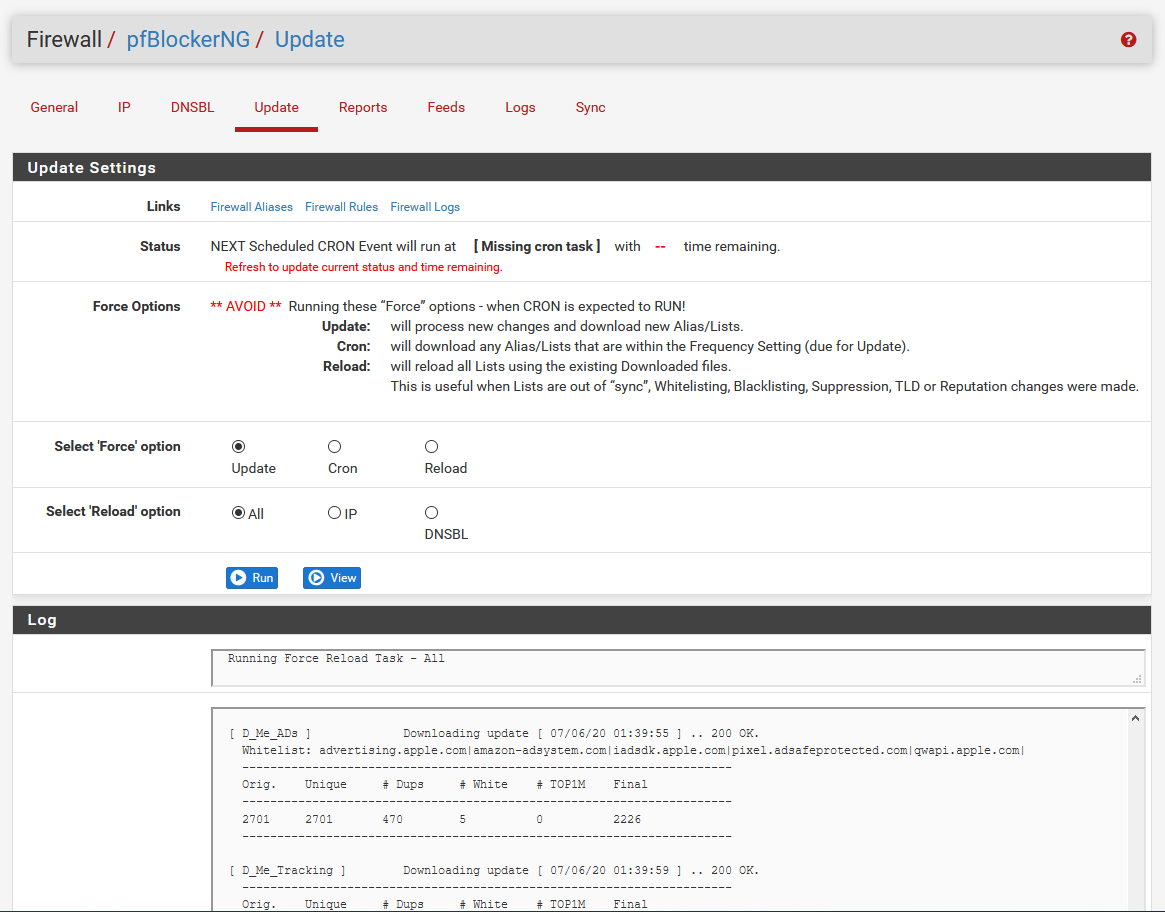
Normally, you’d hop over here to manually update, or to check status. This usually runs on a cron job. We just finished, and there needs to be an initial update, so there is no cron job. It may look like that’s broken, but that’s what you’re gonna see for “Status” the first time.
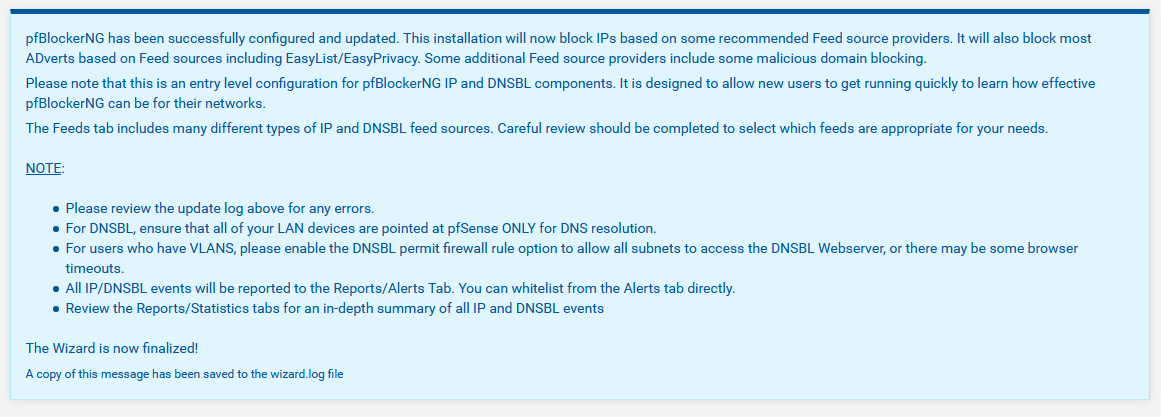
You’re going to be tempted to click Run. Don’t do that. It’ll kick off an automatic update the first time because it can’t function without the data, so let it do its thing. You’ll notice there’s a log at the bottom that’s spitting out a bunch of scary-looking information, and it’s gonna do its thing for a bit, and grab some lists, and the latest updates, and when it’s all done, you’ll see this at the bottom.
Grabbing the lists
Cool! So we installed everything, and ran the wizard. Now that we did that, everything should work, and we're all set, right?
Yeah, no. As much as you probably don’t want me to tell you this, we’re just getting started. pfBlockerNG is now installed, and configured properly after the initial setup. To get it to replace Pi-hole, however, we have to do some setup of some DNSBL lists.
And yes, I know you didn’t have to do any of that stuff with Pi-hole, and it just did it for you. I know this all seems really complicated, and it’s a lot more work than you were expecting, but the payoff is worth it for a tool that can do a whole lot more, and it’s really not all that bad. It’s a lot more involved to set up, but it’s relatively intuitive, as you might have noticed by now.
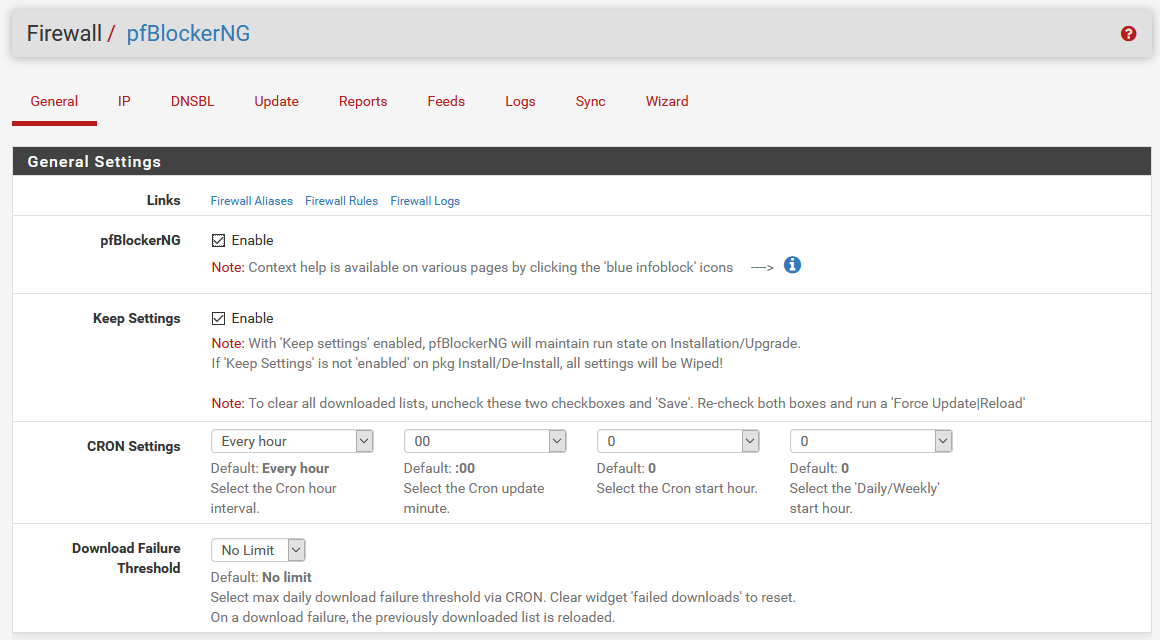
Click your way over to the General tab. You should see both the Enable pfBlockerNG and Keep Settings boxes are both checked.
Feel free to explore more of these settings in the mean time. When you’re done, hop on over to the DNSBL tab, and you’ll see something like this:
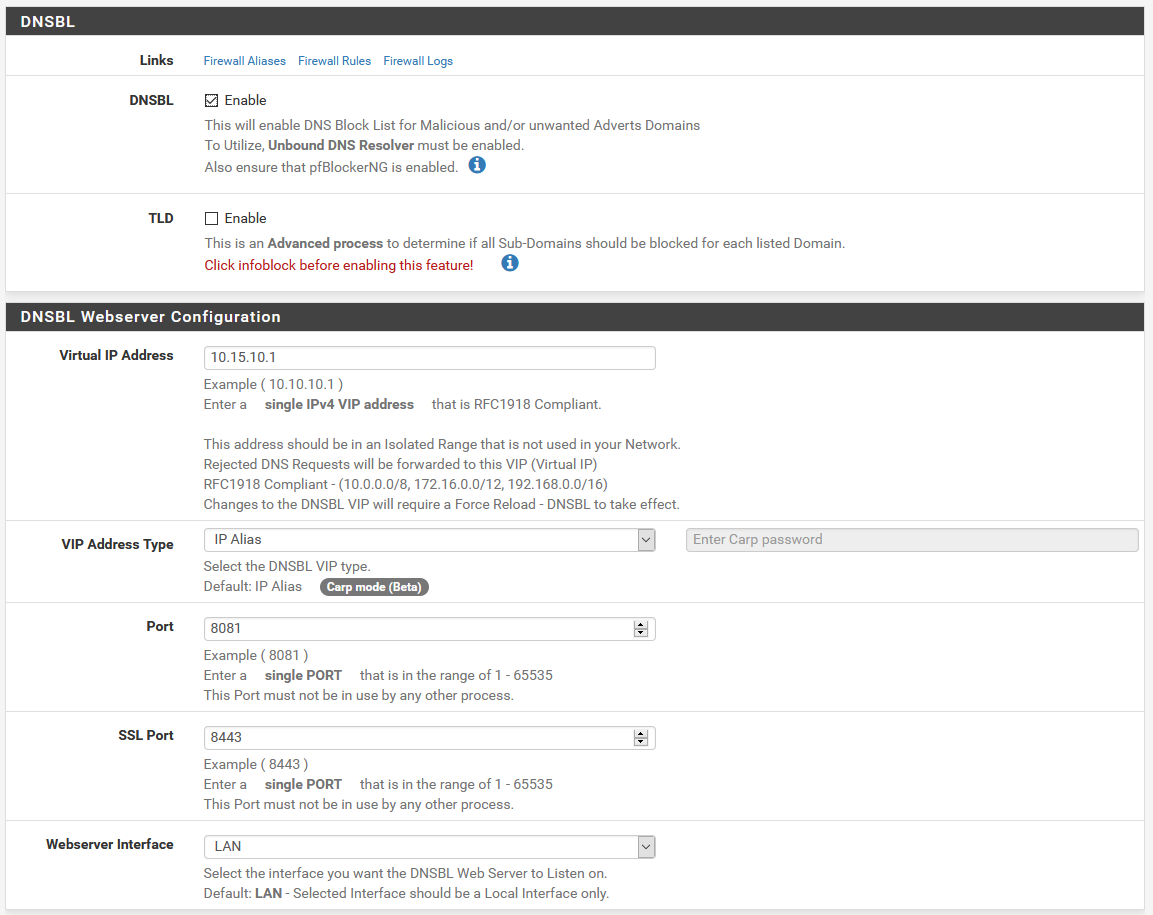
DNSBL should be enabled up at the top. If it’s not for some reason, enable it.
The DNSBL Webserver Configuration is where you’ll find the same settings we saw in the wizard. If you need to change the ports the block page runs on, or the virtual IP it uses, you can do that here.
Once DNSBL is enabled and we know it’s all set, it’s finally time to grab our block lists! Click on the Feeds tab. There’s a lot of lists here, as you can tell, maintained by a lot of different people. The ones with a check by them are enabled and configured, and the ones with the + are ones we can add.
 There's a ton of feed lists here we can choose from!
Notice how there’s a category on top for IPv4. If you scroll down a bit, you’ll find IPv6 as well. Just past IPv6, you’ll find a DNSBL category, which is the one we’re looking for.
 Notice the checkmarks
If you notice, EasyList has a check mark on the left hand side, right by the info icon. This tells you that the list itself already exists. You’ll also notice on the right side, that EasyList and EasyPrivacy have check marks as well, which indicate that those specific feeds have been enabled.
It’s important to note here, that depending on your resources in pfSense, you might not want to enable a ton of lists, as having a lot enabled can potentially slow down your firewall. If you’re on a system with less resources, particularly in RAM, you need to be careful here. Add lists slowly, and keep an eye on memory and CPU usage and such.
Scroll down in the DNSBL list until you see the BBcan177 category, and click the + on the left of the category.
Normally, from here, you can toggle individual lists with the second gray drop down that shows as OFF at the moment. For this single list, we could toggle that to ON, or, to update the whole list, we can click Enable All at the bottom. This will enable the entire group. Also make sure you change the Action in the settings group to Unbound which will make sure DNS blocking gets properly enabled for the group.
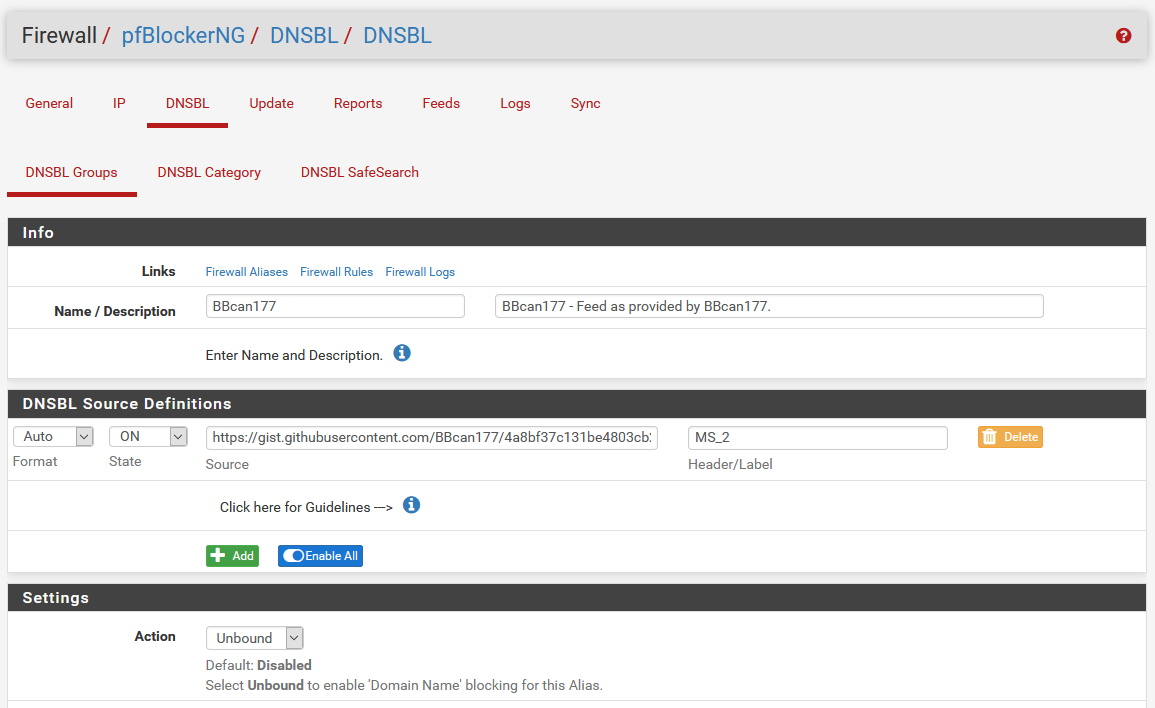
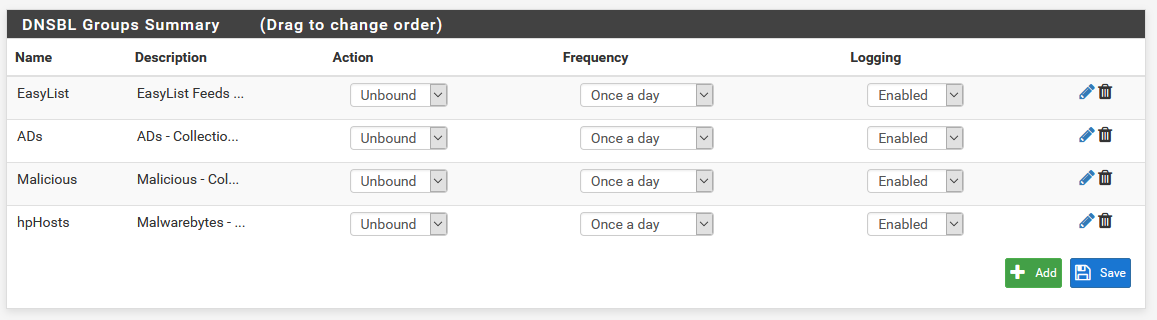
Once you’ve enabled everything in the list, and changed the action to Unbound, scroll to the bottom and click Save. You can repeat this process for each list or feed you want to add. If all of this went according to plan, clicking the DNSBL Groups tab to bring you to the group list should look like this.
As long as we’re messing with feeds, I’d also recommend enabling the Cryptojackers list. You’ll have to go back to the Feeds tab to do so, though. If you ever notice any problems with your domains, and there’s something you can’t get to that you should be able to, you’ll have to tweak some of the lists, and add exceptions.
Doing this is easy enough. If you notice a domain is being blocked that shouldn’t be, head over to the Reports tab, and click the little + next to the domain in question to add it to the whitelist.
Someone on the Pi-hole forums has compiled a custom whitelist for the things that Pi-hole whitelists by default. It’s not strictly necessary, and I find you have a lot more control by whitelisting things manually, but if you want to add this list to the whitelist, you can.
To do so, in the DNSBL tab, click the + to expand the DNSBL Whitelist, and paste the contents of that file at the end of that list. Don’t forget to Save when you’re done!
When you’re done tweaking your feeds and everything, you can either wait for the cron update, or you can do it manually to get it to happen right away. Head to the Update tab, and you’ll see a page like this.
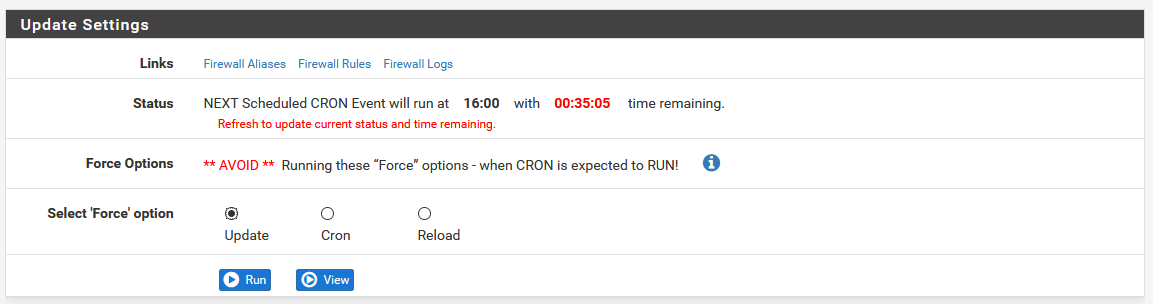
Note the warning about avoiding conflicts with the cron job. If the red timer is under 5 minutes, avoid running a manual update, as it may break things. Anyway, click Run, and you’ll see the same updating logs that we saw during the initial install wizard.
Exploring the settings
We added the feeds from the list, and we enabled the Unbound blocking for them already! I thought we were good to go! There's more?
Well, technically, we are done. But since pfBlockerNG is a bit of a steep learning curve, let’s explore a bit, so we can get a bit more familiar with how to handle things.
For the most part, you won’t really need to touch anything else in here, apart from what we’ve configured already, to get things to work. There’s a lot of settings to poke at to tweak things, so let’s see what some of these more noteworthy settings are.
General
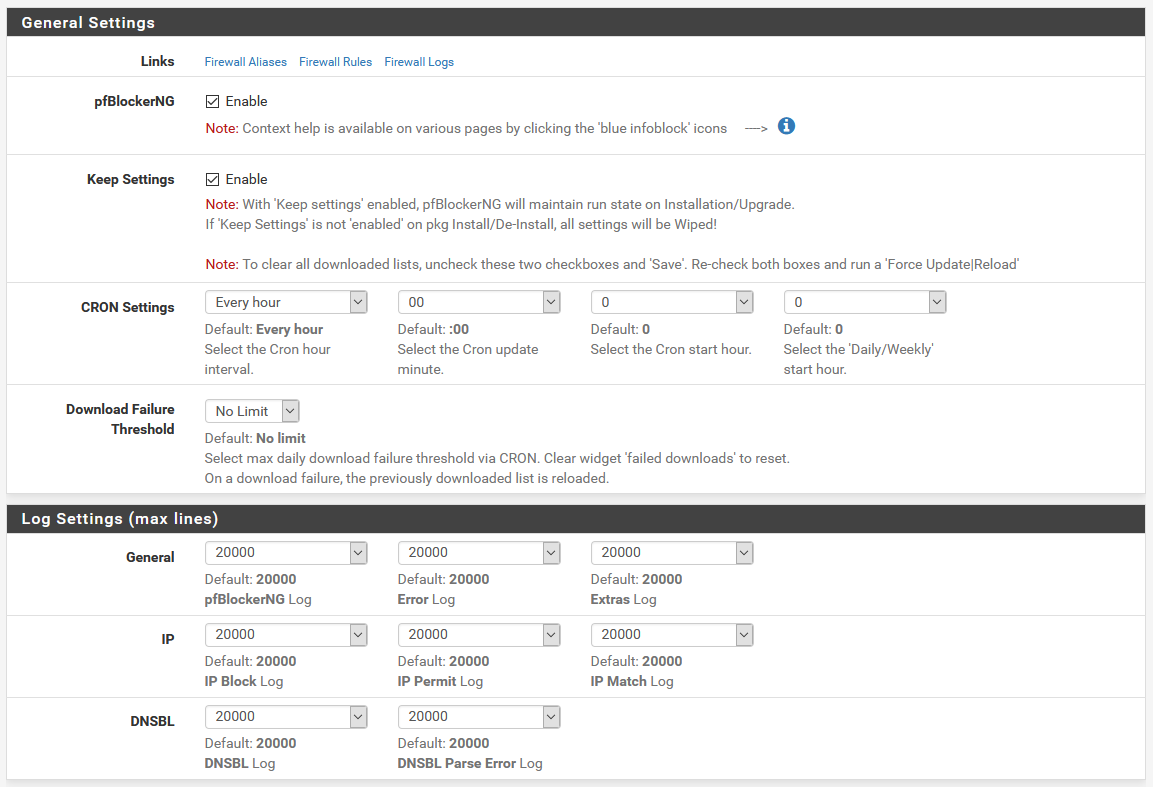
The general settings let you configure the basics of how pfBlockerNG works. For the most part, you should have to touch these. The default CRON interval of every hour is fine for most people, but if you want to update less frequently, you can change that. You can also choose to change the time it updates if you don’t want it updating right on the hour.
Below that, the log settings let you change the line counts for each of the logs. The defaults are perfectly fine.
IP
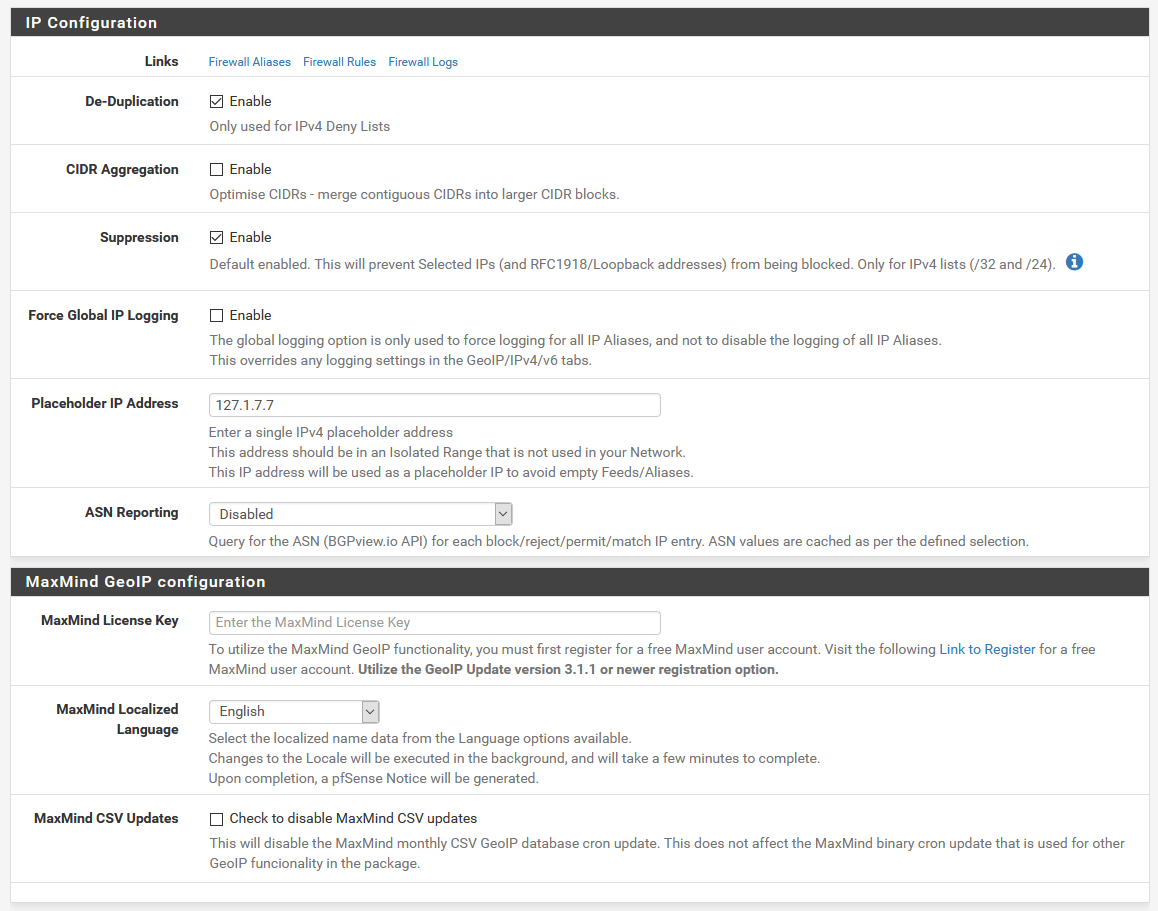
Here, we can update the IP configuration settings like placeholders. The defaults should be fine. There’s also a section for Geo IP blocking. If you have a MaxMind license key, this is where you’d put it to let you do IP blocking based on location.
DNSBL
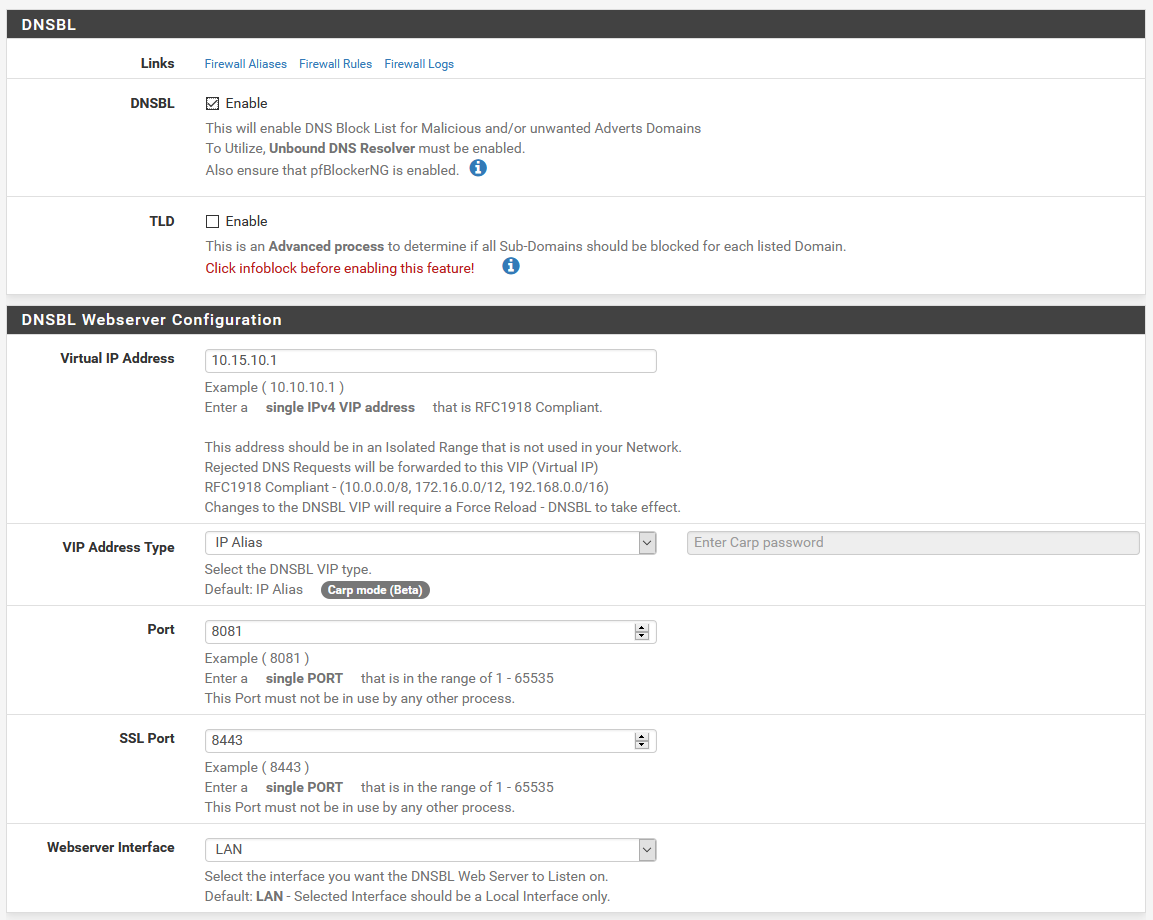
Since we’re replacing Pi-hole here, this is one of the couple of pages that’s really relevant here. For our DNS blocking, we need DNSBL always to be enabled.
I’ve changed my virtual IP from the default of 10.10.10.1, since I have another connected remote site that uses this IP range, but the default is probably fine for you. If it’s not, you can change it here, if you didn’t already change it from the default during the setup wizard.
Below the web server configuration, there’s options to configure firewall rules for DNSBL for allowing web server access. The defaults should be fine for most people.
The part to pay attention to here is the DNSBL Whitelist section. If you ever need to manually whitelist something, and either can’t find it in the reports, or are just adding things in bulk, you can click the + to expand this list, and add whatever domains you want as new lines to the whitelist.
DNSBL > DNSBL Groups
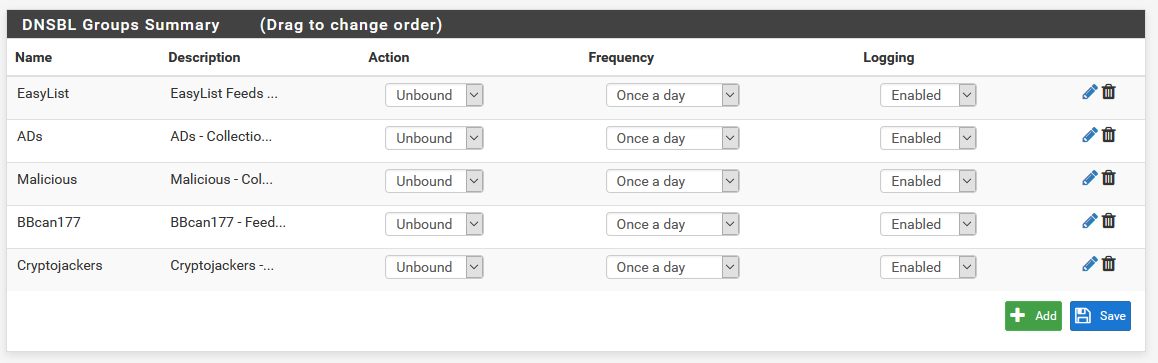
Here, you can change your group order by dragging and dropping, and you can tweak some settings for the groups right there. If you need to edit a group you have already, you can also click the pencil to edit a group, or the trash can to delete it.
Update
The update section, we’re already fairly familiar with. As stated before, you’ll want to avoid manual updates when the CRON updates are about to run, or while they’re running. Normally, this happens automatically, but if you changed the block lists, and need to force an update, this is where you’d do that.
Reports
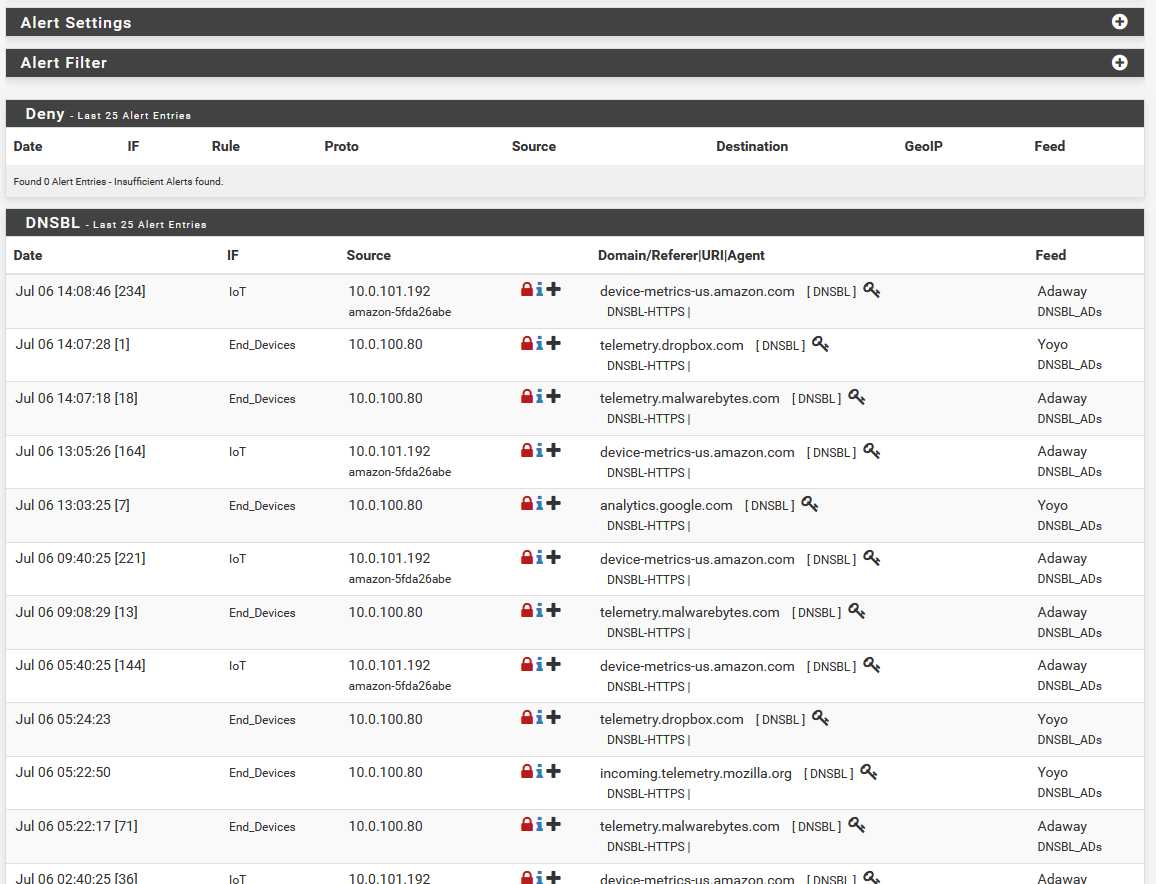
The default tab here is the Alerts tab, which gives you reports about what’s been blocked (as long as the logging hasn’t been turned off in the group settings for a blocklist group, that is). If you need to whitelist a domain, this is generally the place to find it. If something isn’t quite working right, you can click the + on the offending item in the DNSBL section here, and it’ll whitelist that domain.
Reports > DNSBL Stats
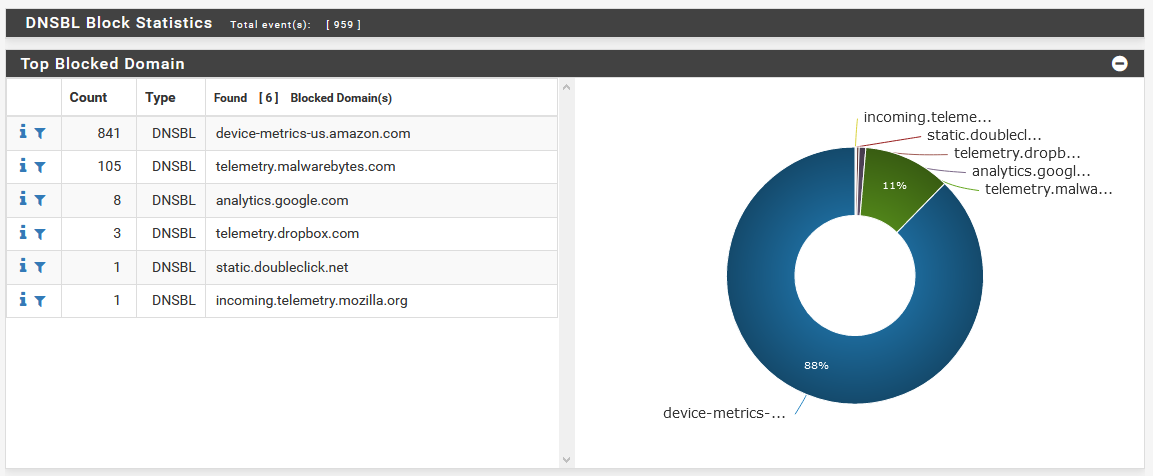
This is where you go if you want pretty graphs and charts as to what’s being blocked. There’s a lot of ways this can be broken down, by blocked domains, by group size, top blocked groups, top feeds, etc. The list goes on, and there’s a lot of info you can find here.
Cleaning up
pfBlockerNG is all set up now. Just a fair warning, as you’ve seen, it’s not nearly as plug and play as Pi-hole. And if you’re using the DNSBL lists to replace Pi-hole, because there’s a lot more lists, and some of them can be more or less aggressive, you’ll have to be prepared to occasionally whitelist or tweak some things. Pi-hole worked so flawlessly because the blocklists were less aggressive, so keep that in mind!
Okay, so pfBlockerNG is all set up, and ready to go! We just have some last minute cleanup to do, since we’re replacing Pi-hole.
All of the clients on the network, in my case, anyway, are using Pi-hole as primary, and pfSense as secondary DNS. If you want to get technical, since Pi-hole forwards to pfSense, we don’t strictly need to fix anything. Since our aim is to replace Pi-hole, and clean up the hopping across the network, we can remove the extra step, and just have clients over DHCP use pfSense instead.
To do this, you’ll have to tweak your DHCP settings, and if you have static clients that were assigned Pi-hole for DNS, you’ll have to change those too.
Once that’s done, you can safely kill whatever hardware or VM you’re running Pi-hole on, and you should be all set!
Believe me, I know this was a long one, but you gain a ton of flexibility by making the switch.